When a homeowner says the basement has to handle storage and storage, I hear a bigger problem: the lower level is carrying all the things the upper floors cannot absorb. That usually means holiday bins, sports gear, a sump pump, a deep freezer, and no clean path through the room. In an older house, especially one with 7-foot-2-inch ceilings, the answer is not to pile on more shelving. The better move is to draw the basement so the clutter lives at the edges and the center stays usable.
Start with the path through the room
A good basement starts with circulation, not cabinets. I like to reserve a clear 36-inch route from the stair landing to the main part of the room, even if that means trimming a shelf depth or shifting a freezer a few feet. That one move changes how the basement feels the second you walk down the stairs. It stops being a storage cave and starts acting like a real plan.
For storage and storage to work, the walls have to carry the burden. Along one side, 24-inch-deep base cabinets can hold bins, printer paper, tools, and board games. Above them, 12-inch shelves can take lighter boxes and rarely used items. If you can, keep the heaviest things low and close to the stair. That saves effort every time someone carries a laundry basket or a box of decorations downstairs.
The trick is restraint. A basement does not need every inch covered. It needs the right inches covered. Leaving one open wall or a low-slung center zone makes the room feel larger than it is, because the eye gets a break.
Build one utility wall and let it work hard
If the mechanical equipment shares the basement, I usually turn that side of the room into a utility wall. This is where storage and storage stop fighting each other. Instead of loose shelving scattered around a furnace, the room gets one organized run with access panels, shutoff valves, and cabinet fronts that can be opened without moving half the contents of the basement.
That wall can hide a lot. A 24-inch-deep cabinet can swallow a vacuum, pet supplies, and cleaning products. A narrow broom closet can sit beside it. A shallow upper cabinet can keep paint cans and seasonal supplies off the floor. If the water heater needs service clearance, I leave that space open and build around it rather than pretending access does not matter. That is cheaper in the long run than tearing out a bad layout later.
In budget terms, a basic utility wall with stock or semi-custom cabinets often lands in the $3,500 to $8,000 range before finish work. Once you add trim, counters, and custom doors, that number climbs. The point is not luxury. The point is to make the wall useful enough that the rest of the basement can stay open.
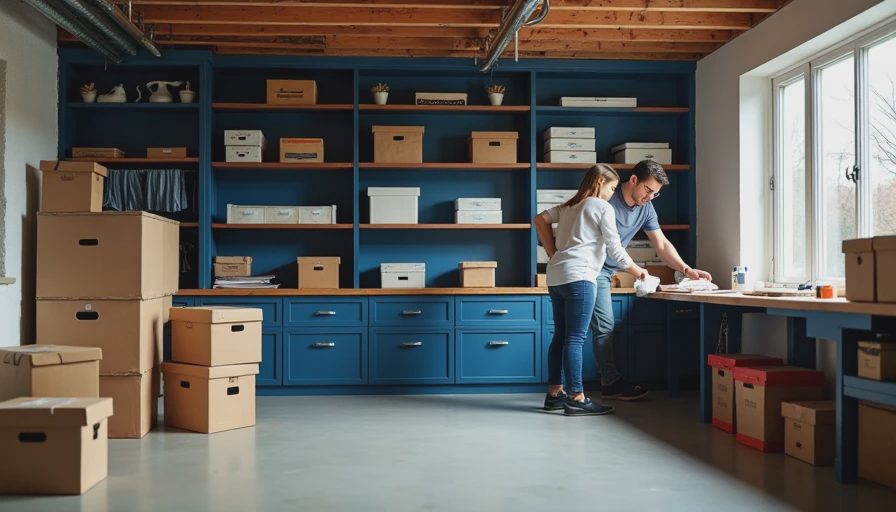
Closed storage makes the finished room feel bigger
Open shelving looks efficient on paper and messy in real life. In a basement, it also makes dust and visual noise harder to ignore. I prefer closed fronts wherever the eye lands first. Flat-panel doors, simple shaker fronts, or even a pair of well-made pocket doors can calm the room fast. The goal is not to hide everything forever. It is to stop the room from reading like a garage.
This is where the phrase storage and storage starts to sound less like redundancy and more like a design problem. The lower level can hold a lot, but not all at once in plain sight. If the basement will also be a den, guest room, or TV space, the storage needs to disappear when the room is in use. That means doors that close cleanly, drawer fronts that align, and cabinet depths that do not pinch the walkway.
I have seen good results with IKEA SEKTION boxes finished with plywood end panels, and I have seen fully custom millwork built to match existing trim. Either approach can work if the proportions are right. A tall cabinet beside the stairs can handle overflow. A low media cabinet can hide board games and streaming boxes. When the storage is integrated, the basement feels finished instead of borrowed.
Spend the money where the room touches the floor
The most expensive mistake is usually not the cabinet. It is the floor plan around the cabinet. If the room is tight, a 12-inch shelf can feel like 18 inches once you add a door swing, a trim return, and a person standing there. That is why I spend time on clearances before I spend time on finish samples. A basement that is designed for storage and storage still has to let someone carry a laundry basket, open a freezer, or turn with a box in hand.
Flooring matters here too. Luxury vinyl plank holds up well in basements because it tolerates the occasional damp spot better than hardwood. Porcelain tile works if you are already planning a more finished lower level and want a harder, cleaner feel. I also like wall lighting that keeps the storage zone bright enough to use, even when the rest of the room is dimmed for movie night or a guest to sleep.
Mechanical realities matter just as much. A dehumidifier, a sump pit, and exposed shutoffs all need access. If you design around them from the start, they become part of the plan instead of ugly interruptions. That saves time, preserves utility, and makes the space easier to live with.

Design for now, but leave room for later
The best basement plans can change without a demolition crew. A family that needs storage and storage today may need a playroom, office, or guest suite later. That is why I like phased work in older homes. Start with the walls that solve the messiest problems. Add flooring, lighting, and a durable storage run. Then finish the central room when the budget allows. A phased basement can still feel complete if the circulation, proportions, and utility wall are right.
If you are trying to get more from a lower level in a pre-1960 house, do not think of storage as leftover space. Treat it like a room with rules. Keep the walk path clear, keep the messy systems accessible, and keep the visible surfaces simple. When those pieces line up, the basement stops being where things go to disappear. It becomes the part of the house that finally earns its square footage.




No notes yet — write the first one.